Chocolate Coconut Bars
Highlighted under: Oven-Fresh Wonders
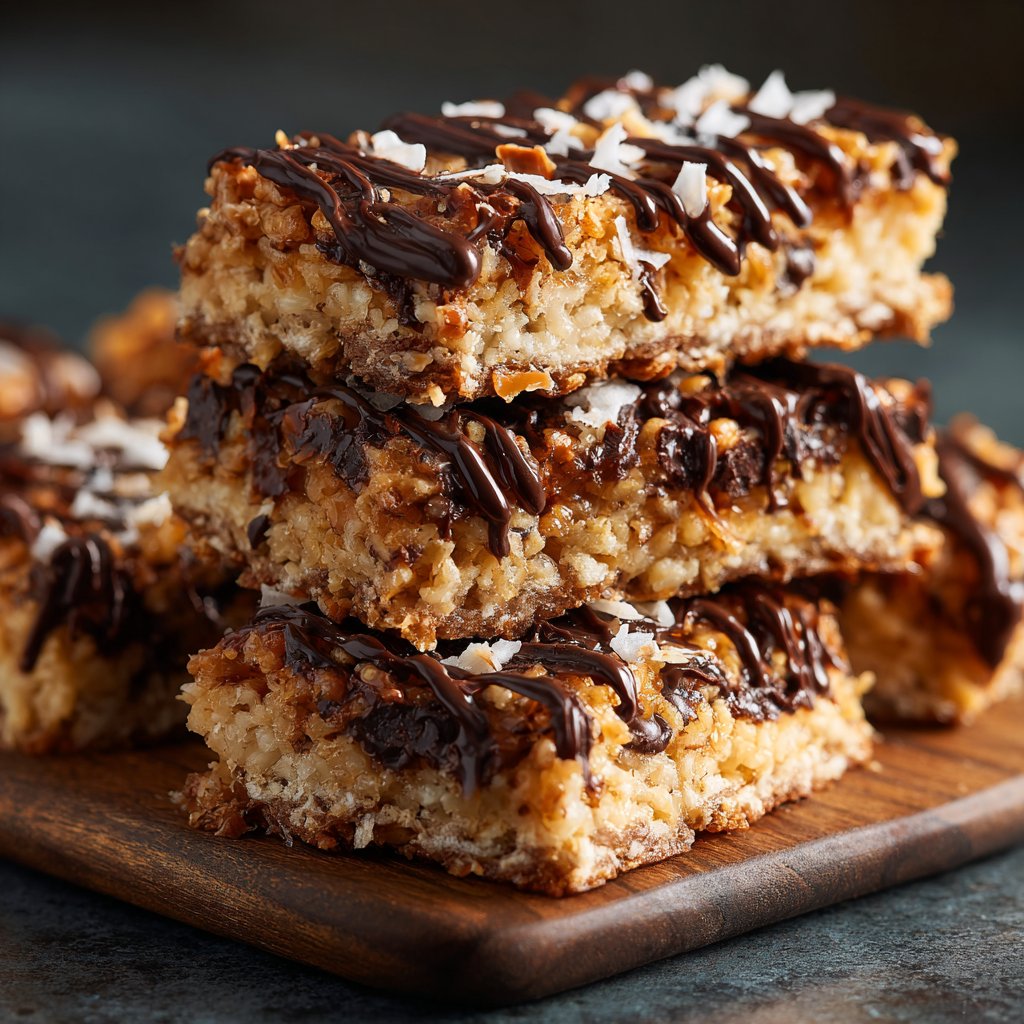
I absolutely love making Chocolate Coconut Bars, and they bring a smile to my face every time I bite into one. The combination of rich chocolate and chewy coconut creates a delightful treat that feels indulgent yet surprisingly simple to prepare. These bars are perfect for sharing at gatherings or enjoying as an afternoon pick-me-up. I can’t resist the joy of cutting into them and revealing the luscious layers, and I know you’ll experience that same happiness when you give this recipe a try.
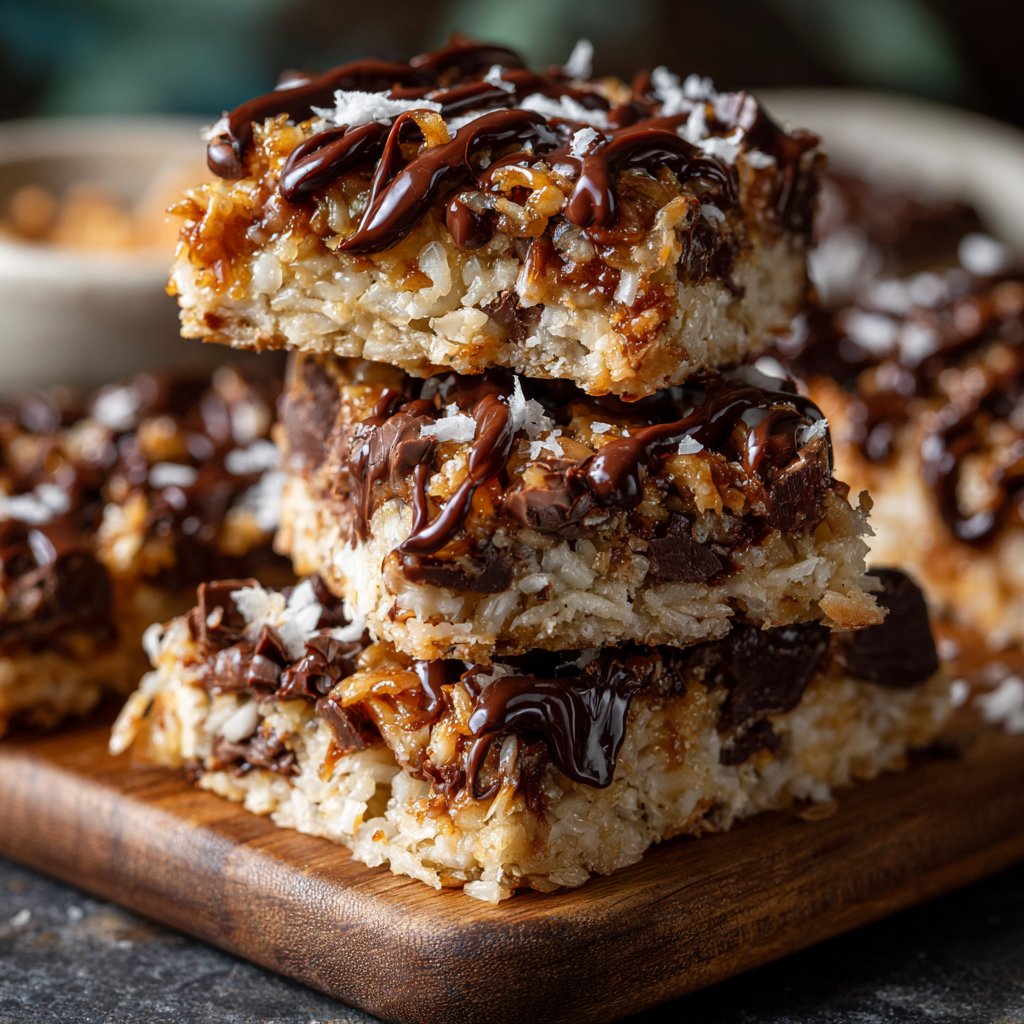
When I first experimented with these Chocolate Coconut Bars, my goal was to create a dessert that balanced sweetness with the unique texture of coconut. After several attempts, I found that toasting the coconut just slightly enhanced its flavor, giving the bars a richness that kept everyone coming back for more. The chocolate layer melts beautifully on top, giving a glossy finish that's hard to resist.
One of my favorite tips is to use high-quality dark chocolate for the topping; it elevates the entire dessert. When I cut the bars, I always let them chill thoroughly first; this solidifies the layers perfectly and makes slicing a breeze. Trust me, once you try them, you won't want to share!
Why You'll Love These Bars
- Decadent layers of chocolate and coconut
- Chewy texture paired with a rich chocolate finish
- Easy to make for any occasion
Mastering the Texture
Achieving the perfect chewy texture in your Chocolate Coconut Bars is key to their delightful experience. The unsweetened shredded coconut gives the bars a satisfying chew, while the almond flour provides a subtle nuttiness that complements the chocolate. Make sure to use finely shredded coconut; larger flakes may result in a drier texture, which is less desirable. If you can't find almond flour, you can substitute it with finely ground oats or sunflower seed flour for a similar effect.
When mixing the base, it’s important to combine the ingredients thoroughly. This ensures that the coconut, almond flour, and sweeteners are evenly distributed, creating a cohesive layer that holds together well. A spatula works best for this job since it allows you to scrape down the sides of the bowl, making sure you capture every bit of the mixture. If your mixture feels too crumbly after mixing, a dash more melted coconut oil can help bind it together.
Perfecting the Chocolate Topping
Melting chocolate can be tricky, so using a double boiler method is recommended for achieving a smooth, glossy finish. Place a heatproof bowl over a pot of simmering water, ensuring the bowl doesn’t touch the water. Stir the chocolate chips slowly until they melt completely, avoiding direct heat to prevent burning. If the chocolate seizes up, adding a teaspoon of coconut oil can help restore its smoothness and shine.
To ensure the chocolate layer sets properly on the bars, let them cool for about 10 minutes after baking before pouring on the melted chocolate. This slight cooling will help the chocolate adhere better rather than sliding off. For added flair, consider sprinkling some additional shredded coconut or sea salt on top before the chocolate fully sets. This not only enhances the visual appeal but also adds another layer of flavor and texture.
Storage and Variation Tips
These Chocolate Coconut Bars are incredibly versatile for storage. They can be kept at room temperature for up to a week if stored in an airtight container, but refrigeration extends their freshness to nearly two weeks. For long-term storage, consider freezing the bars. Wrap them individually in plastic wrap and store them in a freezer-safe bag; they’ll last for up to three months. When you’re ready to enjoy them, simply thaw at room temperature or pop them in the microwave for a few seconds.
If you’re looking to vary the flavor profile, try incorporating different mix-ins. Adding chopped nuts like almonds or pecans will provide a satisfying crunch, making the bars even more enjoyable. Additionally, you can experiment with flavored chocolates, such as mint or orange-infused varieties, to complement the coconut. Vegan alternatives can also be implemented easily—simply substitute honey with maple syrup or agave nectar for a completely plant-based treat.
Ingredients
Gather the following ingredients to create these delightful bars:
For the Bars
- 1 cup shredded coconut, unsweetened
- 1/2 cup almond flour
- 1/4 cup honey or maple syrup
- 1/4 cup coconut oil, melted
- 1/2 teaspoon vanilla extract
- 1/4 teaspoon salt
For the Chocolate Topping
- 1 cup dark chocolate chips
- 1 tablespoon coconut oil
Ensure all ingredients are measured before you start for a smooth preparation process.
Instructions
Follow these steps carefully to achieve perfect Chocolate Coconut Bars:
Preheat the Oven
Preheat your oven to 350°F (175°C) and line an 8x8 inch baking pan with parchment paper.
Mix the Base
In a bowl, combine shredded coconut, almond flour, honey, melted coconut oil, vanilla extract, and salt. Stir until well mixed.
Press into the Pan
Pour the mixture into the prepared pan and press down firmly to create an even layer.
Bake
Bake in the preheated oven for 20 minutes or until lightly golden.
Prepare the Chocolate Topping
While the bars are baking, melt dark chocolate chips and coconut oil together in a heatproof bowl over simmering water, stirring until smooth.
Add the Chocolate Layer
Once the bars are done baking, remove from the oven and let cool slightly. Pour the melted chocolate over the bars and spread evenly.
Chill and Serve
Allow the bars to cool at room temperature before refrigerating for at least 2 hours. Once set, cut into squares and serve.
Store any leftovers in the refrigerator for an easy treat throughout the week.
Pro Tips
- For an extra twist, you can add chopped nuts or a sprinkle of sea salt on top of the chocolate layer before it sets.
Common Concerns
Sometimes, you might find your bars are too crumbly after baking. This often happens if they were not pressed firmly enough into the pan before baking. Next time, ensure to pack the mixture tightly using the bottom of a measuring cup to achieve a solid base. Alternatively, adding a tablespoon of water or a bit more melted coconut oil can help bind the mixture together.
If your chocolate topping ends up too thick to spread easily, don’t worry! Simply return the bowl to your heatproof setup over simmering water, adding a little extra coconut oil while stirring. This will not only thin the chocolate but also keep it glossy, making it easier to work with.
Serving Suggestions
These bars make a wonderful snack on their own, but they can also be dressed up for special occasions. Serve them as part of a dessert platter along with fresh fruit and a dollop of whipped cream or coconut whipped cream to create a vibrant dessert spread. You could also serve them with coffee or tea for a delightful afternoon treat.
For a festive touch, consider drizzling white chocolate over the cooled bars for a striking contrast against the dark chocolate. You could also add colorful sprinkles if serving these at a party or gathering—this enhances their appearance and makes them a hit with both kids and adults.
Questions About Recipes
→ Can I use sweetened coconut instead of unsweetened?
Yes, but be aware it will make the bars sweeter. Adjust the honey or maple syrup accordingly.
→ How should I store leftover bars?
Keep them in an airtight container in the refrigerator for up to a week.
→ Can I substitute the almond flour?
Yes, you can use all-purpose flour or coconut flour, but adjust the quantity as needed.
→ Is it possible to make these vegan?
Absolutely! Use maple syrup instead of honey and make sure your chocolate chips are dairy-free.
Chocolate Coconut Bars
Created by: Hayley Morton
Recipe Type: Oven-Fresh Wonders
Skill Level: Intermediate
Final Quantity: 12 bars
What You'll Need
For the Bars
- 1 cup shredded coconut, unsweetened
- 1/2 cup almond flour
- 1/4 cup honey or maple syrup
- 1/4 cup coconut oil, melted
- 1/2 teaspoon vanilla extract
- 1/4 teaspoon salt
For the Chocolate Topping
- 1 cup dark chocolate chips
- 1 tablespoon coconut oil
How-To Steps
Preheat your oven to 350°F (175°C) and line an 8x8 inch baking pan with parchment paper.
In a bowl, combine shredded coconut, almond flour, honey, melted coconut oil, vanilla extract, and salt. Stir until well mixed.
Pour the mixture into the prepared pan and press down firmly to create an even layer.
Bake in the preheated oven for 20 minutes or until lightly golden.
While the bars are baking, melt dark chocolate chips and coconut oil together in a heatproof bowl over simmering water, stirring until smooth.
Once the bars are done baking, remove from the oven and let cool slightly. Pour the melted chocolate over the bars and spread evenly.
Allow the bars to cool at room temperature before refrigerating for at least 2 hours. Once set, cut into squares and serve.
Extra Tips
- For an extra twist, you can add chopped nuts or a sprinkle of sea salt on top of the chocolate layer before it sets.
Nutritional Breakdown (Per Serving)
- Calories: 270 kcal
- Total Fat: 19g
- Saturated Fat: 12g
- Cholesterol: 0mg
- Sodium: 40mg
- Total Carbohydrates: 24g
- Dietary Fiber: 3g
- Sugars: 15g
- Protein: 3g